The Swan - Scientific Writing Assistant User Guide


What is the Swan - Scientific Writing Assistant and how to start using it?
The Swan - Scientific Writing Assistant aims at helping writers with the content, not the grammar or spelling. It tries to guide you towards known good scientific writing practices and to help your readers in finding your contribution. The tool was designed to help you with your writing, not to merely point out errors.
Using the tool should be simple; just input your text sections to the tool, optionally make some manual elaboration and click Evaluate button. For a more detailed description about this, see Main Menu.
We also list some known issues here, so check there if we know something about the problem you are possibly encountering - we might have a solution for you there! Even if we are unable to offer a solution, please don't hesitate to contact us.
System requirements
1. Your computer need to have 512 MB or more RAM.2. In order to be able to use this tool, you must have Java (Java Runtime Environment version 1.6 or higher) installed to your computer. To check if Java is installed click here. It is recommended that you update your Java installation regurarly for full compatibility with this and other Java applications and for security updates. You can download the latest Java Runtime Environment (JRE) from here.
Also, Java version and operating system (OS) should have the same wordlength. Most of the modern Windows computers (Windows 7 or newer) are 64-bit. If your OS is 64-bit, install 64-bit version of Java.| Java x32 | Java x64 | |
|---|---|---|
| OS x32 | works | - |
| OS x64 | - | works |
Mac users with several Java versions installed should check that only the latest version is selected in Java Preference application.
Troubleshooting & FAQ
- Q: Does SWAN send my text to an another server (eg. cloud) for an analysis?
- A: No. All text analysing is done on the local computer, and nothing of the text is sent to any servers.
- Q: (Windows) When I try to launch .bat file, a black window appears and disappears instantly
- A: Make sure you have Java installed. Also make sure you have extracted the whole .zip package into the same directory before running any files
- Q: I have installed 64-bit version of Java but SWAN still asks me to install 64-bit Java
- A: In some cases the computer already had 32-bit Java installed and it still remains as the main Java installation after 64-bit installation. Uninstall 32-bit Java before installing 64-bit Java (or alternatively use Java Control Panel -> Java to select which installation to use)
Launching the tool
Launching the tool depends on your operation system. To launch the tool, you have to use one of the following script files. The reason for this is, that these script files will reserve more memory for the tool to use than will be reserved if you run the tool directly from .jar file. If you run the tool from .jar file directly, the tool might crash or behave unpredictable.
- On Windows computers: double click Launch_SWAN_(Windows).bat file
- On Linux computers: launch Launch_SWAN_(Linux).sh from command line
- On Mac computers: double click Launch_SWAN_(Mac).command file *
You can do this e.g. the following way: start Terminal, browse to the folder the software is. Then use the following command:
sudo chmod 777 Launch_SWAN_(Mac).command
Terminal might ask your account's password, type it in. After this, you should be able to start the software by double clicking Launch_SWAN_(Mac).command file. You may also be able to grant these permissions via Mac's graphical user interface. More about granting permissions for files and folders on Mac (OS X 10.4): http://docs.info.apple.com/article.html?path=Mac/10.4/en/mh669.html
Main Menu
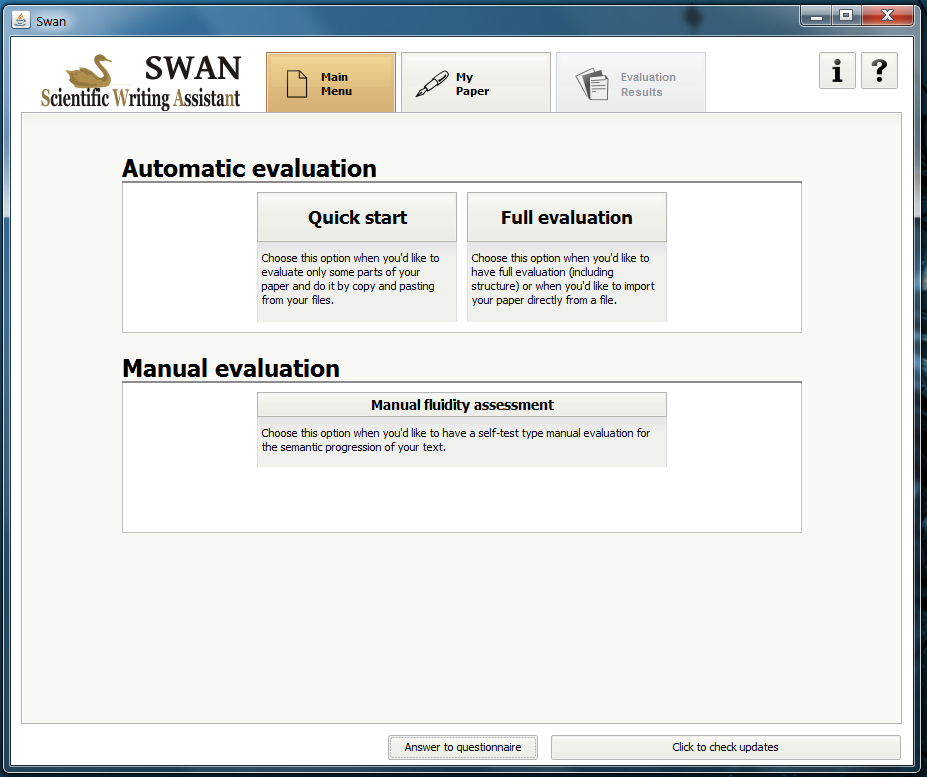
The first window that show when you start Swan - Scientific Writing Assistant is Main Menu.
When you start the application, the first window you see, is the Main Menu section. This is your Main Menu for using the application.
Here you can choose from three options:
You may start a quick evaluation or full evaluation or you may perform a manual evaluation.
In quick evaluation, you can insert your title, abstract, introduction and conclusions separately. This is a good choice if you use this application for the first time, would like to quickly see what kind of things it does, or would like to get results for only some parts of your paper.
In full evaluation you import your paper from a file. This option takes longer time to go through but on the other hand you can also get more results, which includes e.g. feedback from your paper's structure.
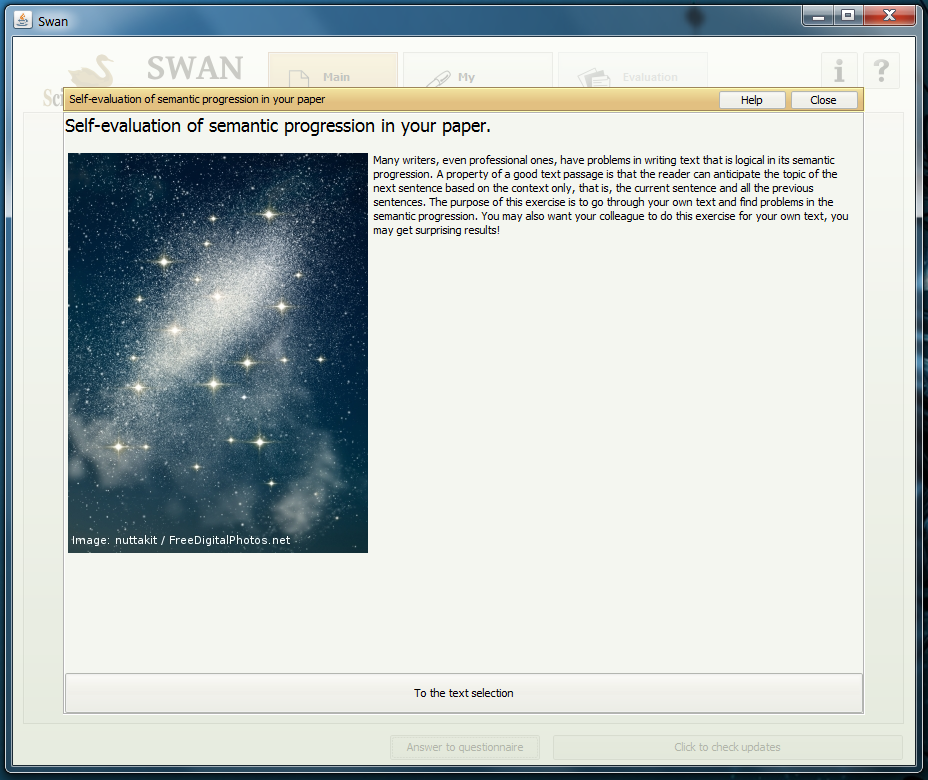
In manual evaluation it is up to you to make an evaluation for your paper or section of it! The manual evaluation contains a self-test for semantic progression. While this may take longer time and you have to put some effort to it, it can reveal things from your text that otherwise might not have come into light.
To start a quick evaluation, press the quick evaluation button. You are then moved to My Paper section. You can also accomplish the same by pressing the "My Paper" tab. In My Paper section, you can insert parts of your paper by copy and pasting them to appropriate places. For a more detailed description about this, see My Paper.
To start a full evaluation, press the full evaluation button. You are then prompted to choose the file from where you would like to import your paper. After choosing it, you may start marking the various parts (title, abstract, introduction, etc.) of your paper. For a more detailed description about this, see Importing a file.
To start a manual evaluation, press the manual evaluation button. You may then insert the text you wish to self-test, or if you have already inserted text to the application, you can choose from them.
My Paper
My Paper section of the application. In this screenshot the quick evaluation option has been selected; in the full evaluation there will be a structure section among the others.

My Paper section of the application in full evaluation mode.
This is the second section of the application. Here you can copy and paste (or alternatively import from a file) parts of your paper to the application and do optional fine tuning for them. For a quick evaluation you can ignore the optional fine tuning, but if you would like to get some more results and feedback from your text, doing these can be useful. You can also choose which sections to include into evaluation by pressing check-boxes next to section names. After this, you are ready to start evaluation for your paper. This can be done by pressing Start Evaluation button.
As the screenshots above show, the My Paper section will be slightly different whether quick or full evaluation has been chosen. In quick evaluation, there won't be a section for structure and you can't have any feedback from your paper's structure. Instead you can quickly evaluate the parts of your paper you want by copy and pasting them to their appropriate tabs. In full evaluation there will be option to get feedback from structure but you can't copy and paste parts of your paper directly; instead you have to use the "Edit" button. More about importing and modifying your paper in Importing a file.
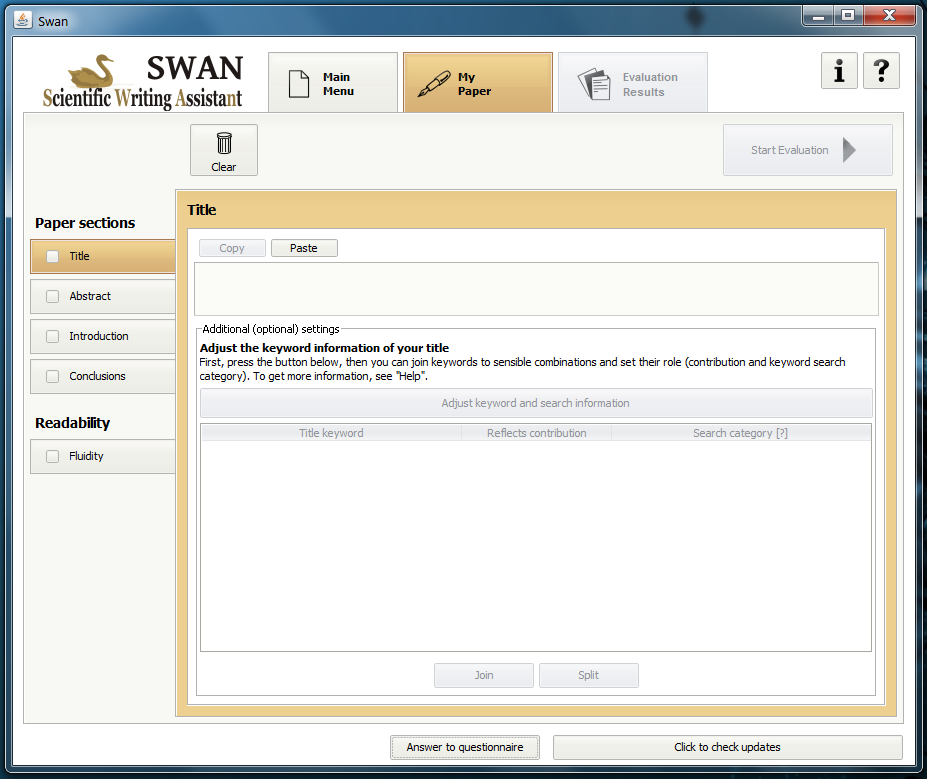
Title section
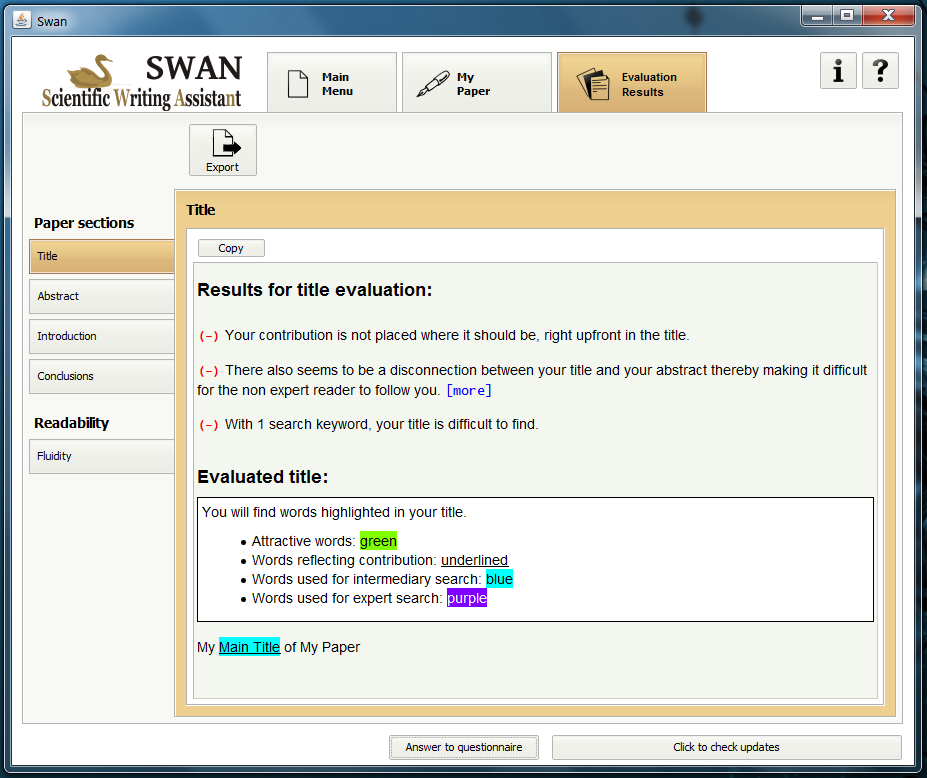
Title section.
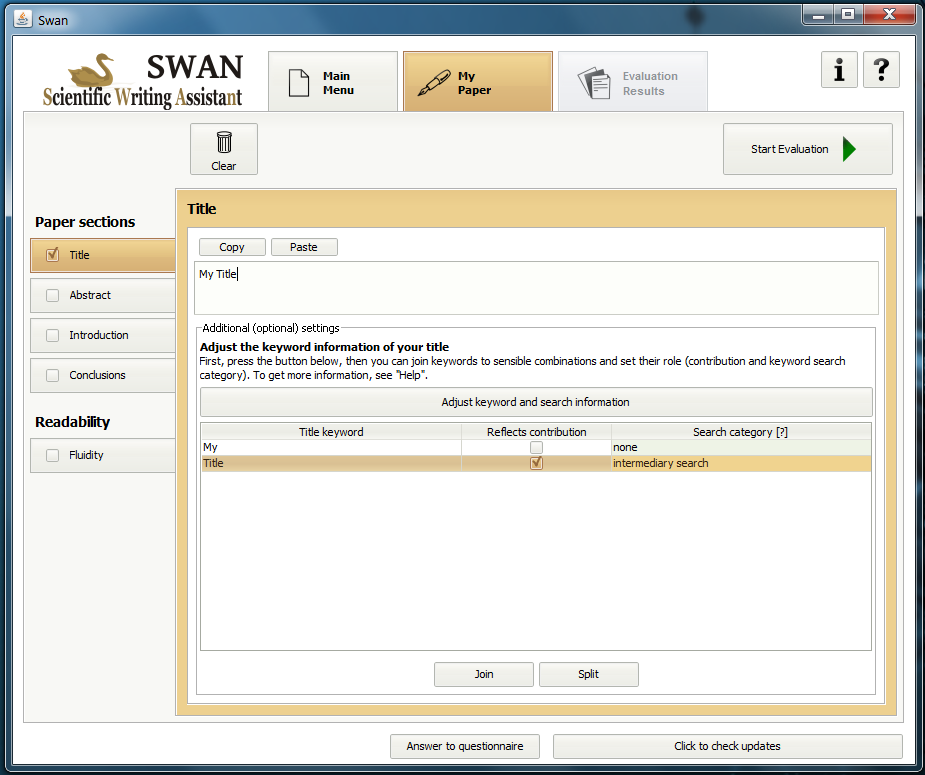
This section, as it says, concerns your paper's title and is the place where you insert your title in quick evaluation mode (in full evaluation mode your title will be inserted automatically after you import your paper). Optional fine tuning concerns title keyword (a.k.a. the words in your title that are the most important) adjustment. This adjustment includes joining separate title keywords into meaningful combinations, selecting keywords that reflect the contribution in your paper, and adjusting search categories for the keywords.
About search categories:
- Generic search keywords:
- Frequent, generic search keywords for non-experts, e.g. domain name or research type "simulation" - Intermediary search keywords:
- For people interested in methodology or application or other items of interest found in multiple
papers across domains but within the same journal - Expert search keywords:
- Search keywords with low frequency and used for specific expert search - None:
- Keyword is not used as search word
Abstract section
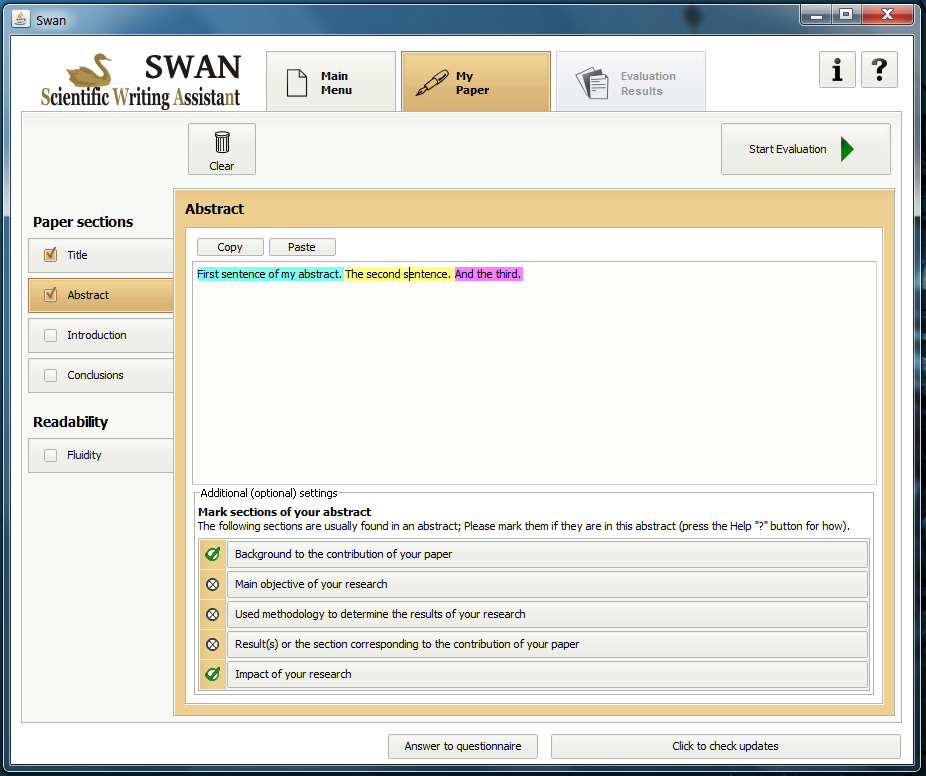
Abstract section.
This is the section into which you can insert the abstract of your paper. Please note, that if you would like to have evaluation results for abstract, you must also specify your title as title and abstract are connected with each other.
Optional fine tuning includes marking the sentences of your abstract. These are the parts that are usually good to have in your abstract. Thus, the purpose of this fine tuning is to let you become aware of possible lacking but important sections in your abstract text. The parts are the following:
- Sentence(s) that describe the background to the contribution of your paper
- Sentence(s) that describe the main objective of your research
- Sentence(s) that describe the used methodology to determine the results of your research
- Sentence(s) that describe the result(s) or the section corresponding to the contribution of your paper
- Sentence(s) that describe the impact of your research
Here are the instructions of how to do the marking:
- First, click on the sentence you would like to mark
- A yellow marking will appear to the sentence
- Then, you can select the meaning for the sentence by clicking the appropriate button below the text section.
- After the selection, the color of the selected sentence will change to indicate you have successfully marked the sentence. Also the color of the button changes to indicate the selection.
- To remove a selection, you just simply first click on the selected text and then press the selected button again. Then the color indication disappears and the deselection is ready.
Introduction section
Introduction section.
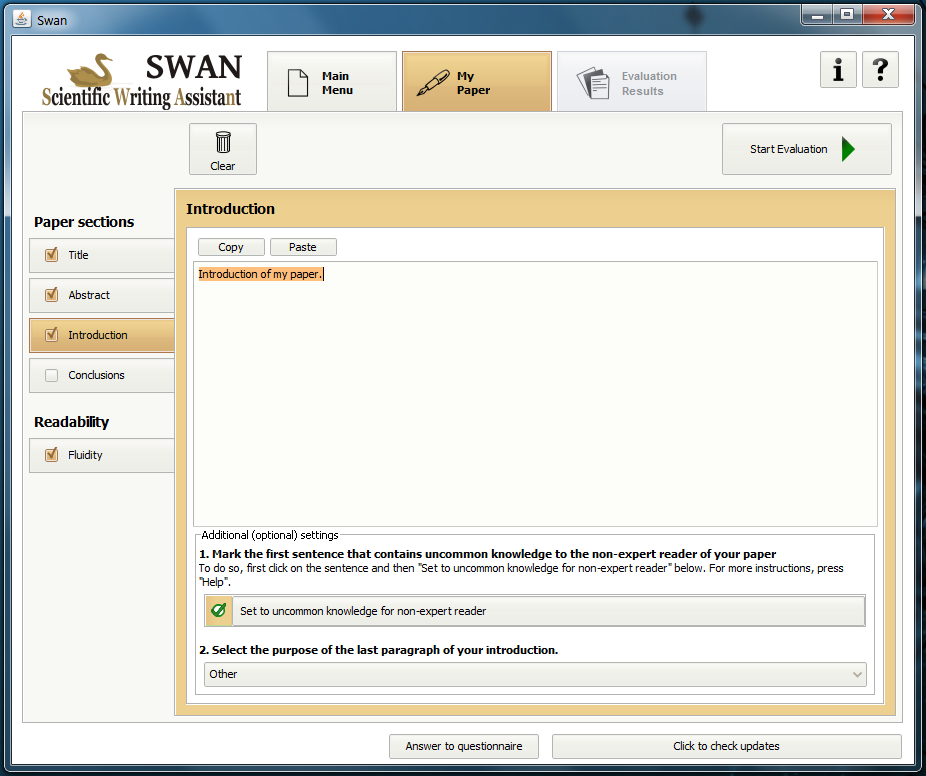
Introduction section is the place you insert the introduction text of your paper. Optional fine tuning includes marking the first sentence that contains uncommon knowledge for the non-expert reader of your paper and selecting the purpose of the last paragraph in your introduction.
Marking the uncommon knowledge containing sentence
Here are instructions of how to mark the first uncommon knowledge containing sentence:
- First, click on the sentence you would like to mark
- A yellow marking will appear to the sentence
- Then, you can select to set the sentence to uncommon knowledge by clicking the appropriate button below the text section.
- After the selection, the color of the selected sentence will change to indicate you have successfully marked the sentence. Also the color of the button changes to indicate the selection.
- To remove a selection, you just simply first click on the selected text and then press the selected button again. Then the color indication disappears and the deselection is ready.
Selecting the purpose of the last paragraph in your introduction
- Selecting the purpose is simple: just take a look at the last paragraph of the introduction text and choose the appropriate purpose for it from the drop down menu.
Conclusions section
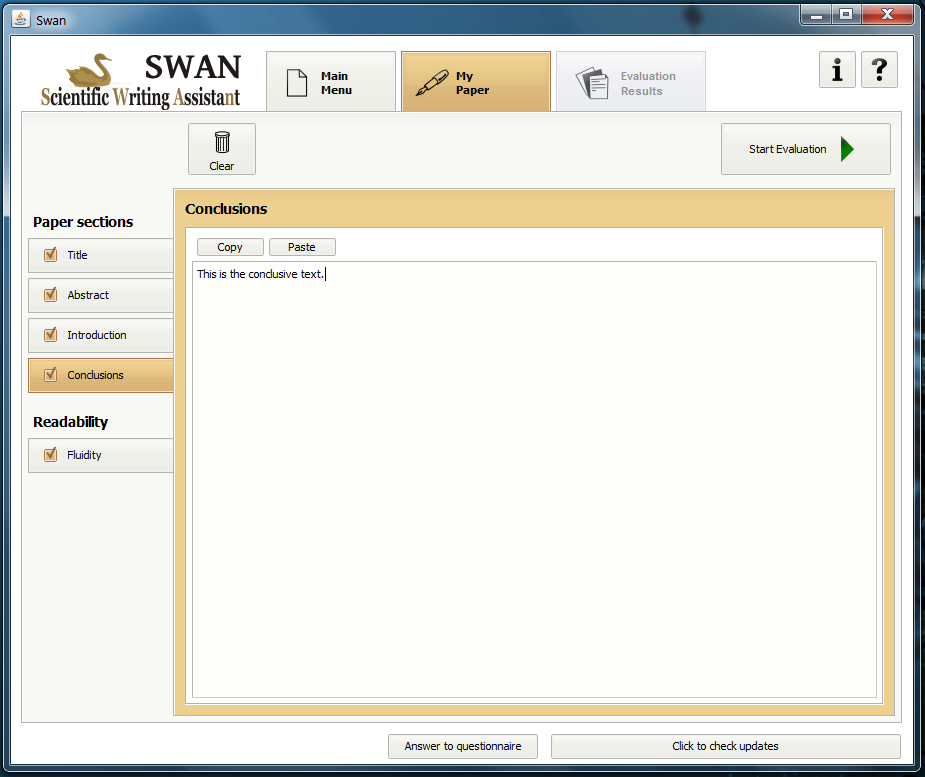
Conclusions section.
This section is the place for the conclusion text of your paper. Insert your conclusion here if you would like to get evaluation results for your conclusions.
Structure section
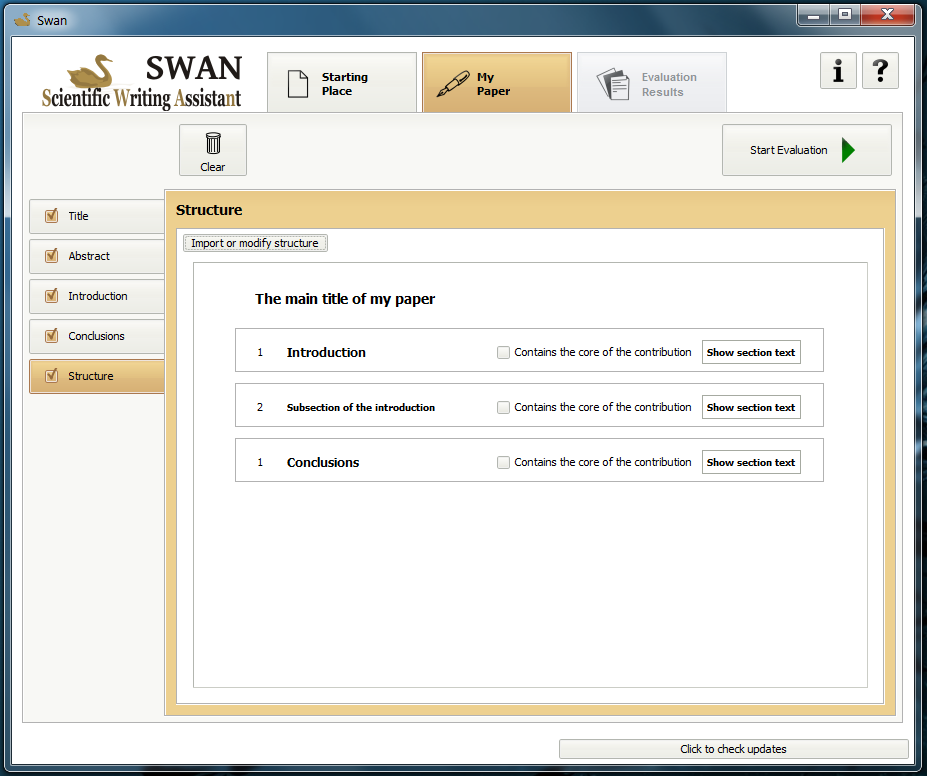
Structure section with imported and extracted structure.
In structure section you will see the structure of your paper if you are in full evaluation mode and have imported your paper. You can also modify an already imported paper and choose whether you want to evaluate it.
Fluidity section

Fluidity section.
What is fluidity?
This is the place where you evaluate how well your text flows from sentence to sentence. When your text is fluid, the reader never has to stop and think how a new sentence is connected to the previous sentences in the paragraph; the reader's thoughts are never derailed for they follow carefully laid tracks made of connected words which support the writer's connected thoughts.
The SWAN fluidity evaluator will detect some possible fluidity problems, which you would be wise to address. These problems may come from sentences that are out of order, sentences that abruptly change their topic, thus halting the reader and forcing a thought "reset".
How does SWAN evaluate fluidity?
SWAN extracts from the words themselves clues that thoughts are connected. It uses natural language processing tools to search for the connection between words in sentences that appear "close enough" to each other. More specifically, the evaluation is based on finding word reccurences in consecutive sentences. These words also need to reappear in certain parts of the sentence. If you are interested, SWAN even tells you how it labels a sentence given - level of fluidity - just click on the [more] button that ends each result heading.
We have indentified four basic levels of sentence fluidity. They are the following: "fluid" sentence, "inverted topic" sentence, "out of sync" sentence and a "disconnected" sentence (not fluid). The full markup identifies the sentence main clause, topic and stress words, as well as words that we use as fluidity indicators. These are grammatical terms which are explained in the book that served as a basis for the metrics used in this tool: "Scientific Writing: A reader and Writer's guide". To view sample explanations about the concepts behind text fluidity require click here.
Limitations of the tool
Sometimes, the diagnostic will be wrong. It may be simply because the computer is unable to understand that the verb reduce in one sentence is linked to the noun reduction in the next sentence. It may also be because the software that analyses the sentence mistakes a verb for a noun. We are working on improving the tool, so these limitations will one day be removed.
Similarly, the software is, at this time, unable to link the name "hammer" in a sentence, with "the tool", a more generic name, in the next sentence - giving you an undeserved "disconnected" verdict.
This said, we recommend that in combination with the fluidity tool you use the "Manual Continuity Assessment" tool. You will often find that the two concur. Sometimes, however, the fluidity tool may determine that sentences are fluidly connected whereas the "manual continuity assessment" tool disagrees. Always believe the "manual continuity assessment"! It relies on your understanding of a sentence - a human one, not a machine one - and is therefore superior That tool simply requires more of your time than the automatic fluidity tool - but its diagnostic is more reliable at this time.
Usage notes
It is preferable to clean the text from all non-text material such as formulas, reference numbers, etc before starting the fluidity evaluation. Otherwise, the tool may encounter difficulties it cannot resolve and require you to quit the application. These teething troubles will gradually be sorted out and the tool improved, but we are sure that, in the meantime, it will provide useful guidance.
More explanation about the fluidity concept
Briefly, the topic of a sentence is the known information often found at the head of a sentence. It carries the context forward from one sentence to another. It allows the reader to understand how two consecutive sentences are related.
The stress is often found after the topic, usually between the first verb in the sentence and the end of that sentence. It is new to the reader - and is therefore "stressed".
The main or independent clause is the whole sentence if it only contains one verb. When the sentence includes several verbs, the main clause is called "main" because under it, comes another piece of the sentence also with a verb, called the subclause or subordinate clause. For example, in the sentence "Because it rained that day, the paint did not dry on time", the main clause is the paint did not dry on time." The subordinate clause is "Because it rained that day". Note that the subordinate clause cannot stand alone, and requires the main clause to make sense.
The reason why the main clause is identified is because it often contains the topic and sets expectations as to what may be in the next sentence. Expectations play an essential part in determining sentence fluidity.
A "fluid sentence" is a sentence that does not interrupt the flow of thoughts created by the previous sentence(s); in fact, it prepares the reader to the next sentence by giving clues or raising expectations as to what is coming next. A sentence that is not fluid resets these thoughts and aborts the expectations created by the previous sentence(s). It is "disconnected" from their context. Fluidity is often broken by a sentence "out of sequence". After writing about something in a first sentence and then changing topic in the second sentence, the writer returns to the first sentence topic in the third sentence and continues to elaborate on the old topic. The second sentence is said "out of sequence" - it interrupts the logical continuation of the first topic. Sometimes the fluidity is not broken, it is just delayed when the sentence breaks the regular pattern: old information(past context) at the beginning of a sentence - and new information at the end of a sentence. The reader is able to reconnect the new sentence to the previous one, but only at the end of the sentence when finally the old topic is revealed. This situation is known as an "inverted topic". These sentences are awkward and slow to read.
You can find more of these grammatical terms explained in the book that served as a basis for the metrics used in this tool: "Scientific Writing: A reader and Writer's guide"
Summary
We are happy to provide you this very early version of the fluidity evaluator. We humbly ask for a forgiving spirit as you encounter errors due to today's limited natural language understanding.
Manual Continuity Assessment (manual fluidity)
Manual Continuity Assessment.
"Manual continuity assessment" or manual fluidity assessment is a manual counterpart for automatic fluidity tool. Whereas in automatic fluidity the computer will go through your text and gives you feedback about the fluidity, in the manual fluidity it is up to you to do the evaluation! This may sound like it takes a lot of time and work; this may be true, but the results you will get are more accurate than in the automatic fluidity evaluation.
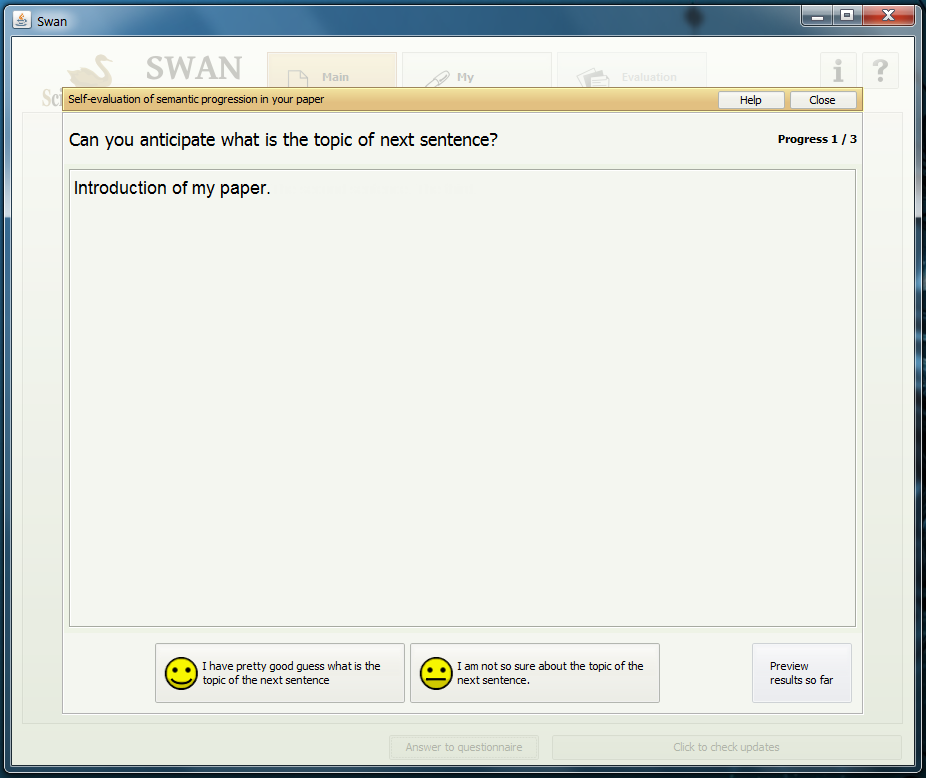
Manual Continuity Assessment - Going through the sentences.
Using the "manual continuity assessment" tool is simple: just start it from the Main Menu window, enter your text (or use some part of your text you have already entered into the software) and you are ready to go. After this the tool will show you each sentence of your text one at a time and will ask you whether you can anticipate what will be the topic of the next sentence. If you can't anticipate the topic right away, the tool will show you small part from the next sentence until you can anticipate the topic or the sentence ends. This will go on until the last sentence of your text.
After you have gone through all the sentences of your text, the tool will show you the results. You can also save these for later use.
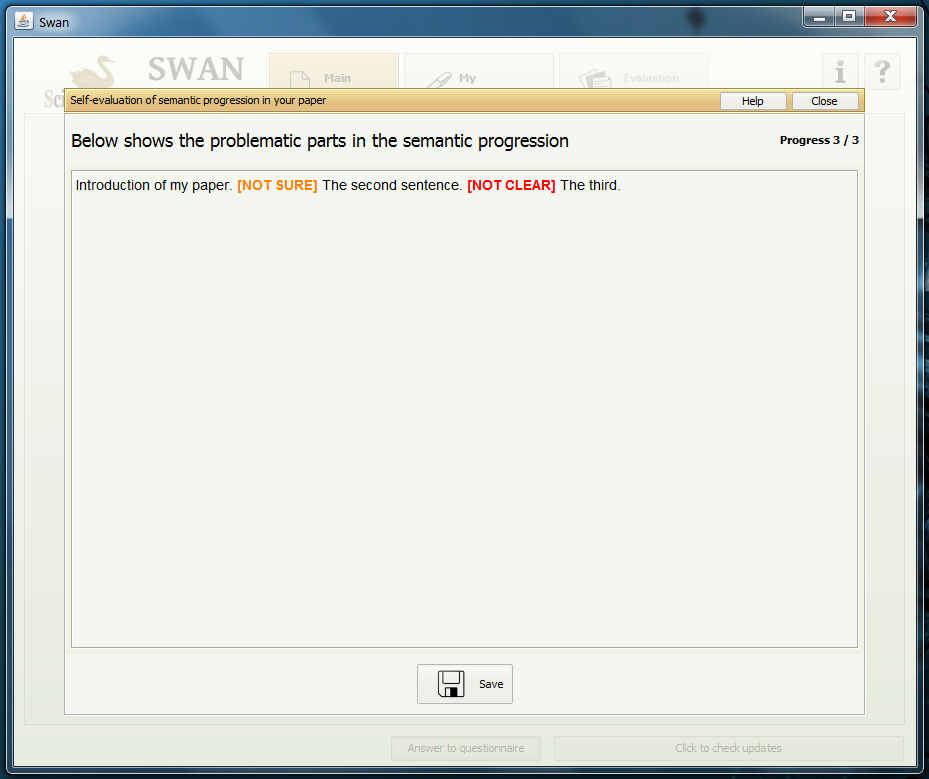
Manual Continuity Assessment - The results.
Evaluation Results
Evaluation results.
This section contains the results for an evaluation. The section is disabled until you have completed an evaluation.
In Evaluation results section you will find enabled the sections you selected to evaluation. By pressing these section tabs, you can browse results for different sections.
Result for a section is divided into two parts: first you have feedback from your text. This feedback can point out missing or otherwise lacking parts of your text and give you tips about how to improve and fix these. Feedback can also point out what good you have in your text. The other part of the result contains your text with highlights on it. These highlights can be e.g. single words that should be avoided or full sentences that contain something you should become aware of.
These results can also be exported to a html file which you can open in your Internet browser and print. For a more detailed description about exporting results to html file, see Export.
Importing a file
You have two ways to insert text for an evaluation in this application: the first one is to manually copy and paste text from your files, the another one is to select the file that contains your paper and let the Swan - Scientific Writing Assistant to read it.
If you choose the first one, you just simply copy the parts of your paper you wish to evaluate and paste them to the corresponding sections in the application.
If you choose to let the application to read your file, you can do this by clicking the full evaluation button from the Main Menu. After this, the application will read your file and tries to automatically extract the structure from it. The supported file formats for automatic structure extraction are OpenDocument (.odt) and Latex (.tex). You can also import text from another file formats, but then you will have to manually select the structure of your paper.

The first window of file and structure import.

The import window after a paper has been imported.
In the second window you will have two options: you either import your paper from a file or copy and paste it to the text area. If you copy and paste text directly, you will have to extract the structure of your paper by hand. If you choose to import your paper from a file, you will be prompted to browse and choose the file and if the file is one of the supported formats (OpenDocument or Latex) for automatic structure extraction, the application will try to extract it for you.
Regardless of whether you copy and pasted or imported your paper from file, you can adjust the headings and subheadings also by hand. This is done by highlighting the heading from the text and pressing "Add to headings ->". You can also change the heading level or remove the heading from the right side of the window.
After you have done all necessary adjustment to the headings, you select the sections of your paper which will be evaluated. This can be done by first pressing "Structure" button.

Paper section selection.
The paper section selection happens similarly to heading selection: you will first highlight the text section from the text area and then press one of the buttons below the text area.
After completing heading and section adjustment, press "Finished". You can come back to this window by pressing Edit button from My Paper section
Toolbar explained
The Swan - Scientific Writing Assistant contains a set of buttons on the My Paper and Evaluation results sections. These buttons include the main functionality of the application.
Clear
Clear button resets the application. This includes the following actions:
- Clearing texts you have inserted to the application
- Clearing settings you may have done to the application
- Clearing results you may have got after evaluating your paper
- Please, use this only if you don"t mind losing the things mentioned above.
Export
Saves results to file from where you can view or print them later. In order to view results outside of the application or print them, you can export your results. This can be done by pressing the "Export" button. You are then prompted to choose the place into which you want to save the results file.
Evaluate
Evaluate button launches an evaluation for the text you have inserted to the application. After the evaluation is over, you will be moved to the Evaluation results section.
Edit
Edit button is shown only in full evaluation mode and will be used to modify an already imported paper. Pressing this button will show the structure import window where text can be modified.